

Hi and welcome to another wedding post! This is going to be a big one – today we’re talking about how we made the bouquets, boutonnieres, and corsages for my wedding from sola flowers!
And this one’s a little different because… this post was written by my mom!!
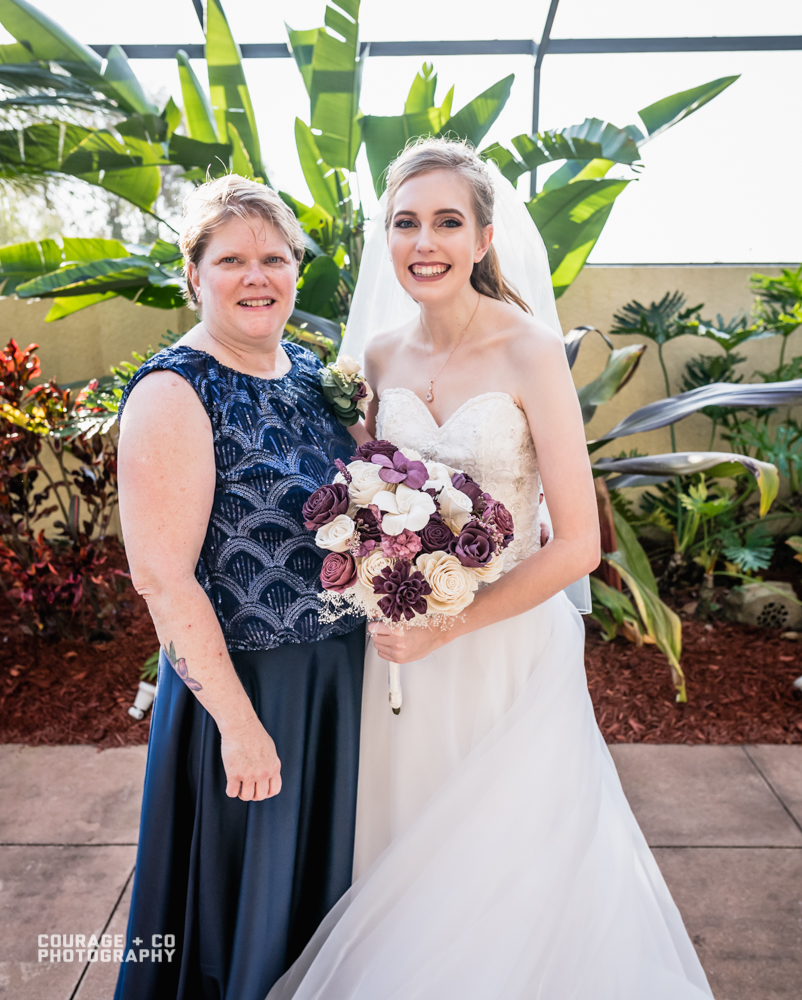
That’s me and my wonderful mother!! She was the mastermind behind the sola flowers, so I wanted to get her input before writing anything…and then I decided it would be easier to just let her tell the whole story rather than having me retell it.

A little background first: our flowers were one of the most stressful parts of the wedding, just because we could NOT figure out what the heck we wanted. It got to the point where it was like, December and we were getting married in February and we still hadn’t made a decision. I even mentioned in my “1.5 Months Left” post that we hadn’t picked anything yet!!! I thought real flowers would be too expensive but I couldn’t find any silk ones that I liked – and then we started looking into sola flowers.

If you aren’t familiar, sola flowers are made from a very thin flexible wood similar to balsa wood. Sola wood comes from tapioca plants except you can’t eat it. I mean, I guess you could but you probably don’t want to. Anyway, we didn’t make this decision until pretty late in the game, so it was going to be a LOT of work…and that’s where my lovely mother comes in! I’ll let her tell the rest… (I’ve added a few comments of my own which will be labelled as editor’s notes! 😉)
– – – – – – – – – – – – – – – – – – – – – – – – – – –
Getting Started
Hi, Kaela’s mom here. When she asked about flowers, I had to give you my version of what happened. Before I tell the story, I should say I know my way around a glue gun. I’m not super crafty, but can replicate things with the best of them. And, I did the flowers for our wedding 30+ years ago. They were silk, made from the petals up and I was finishing them up three hours before the wedding started.
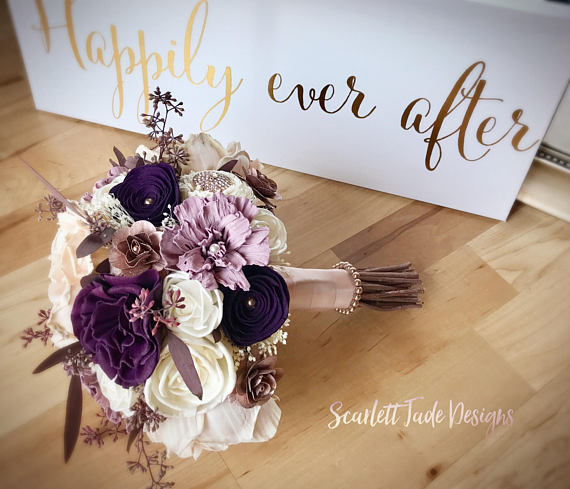
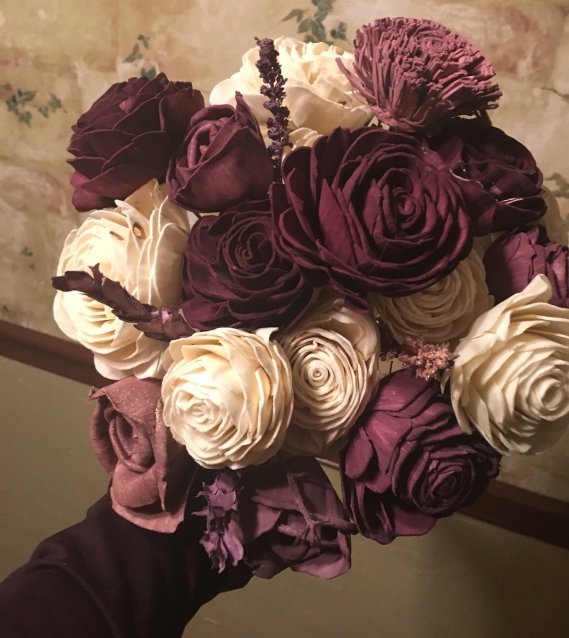
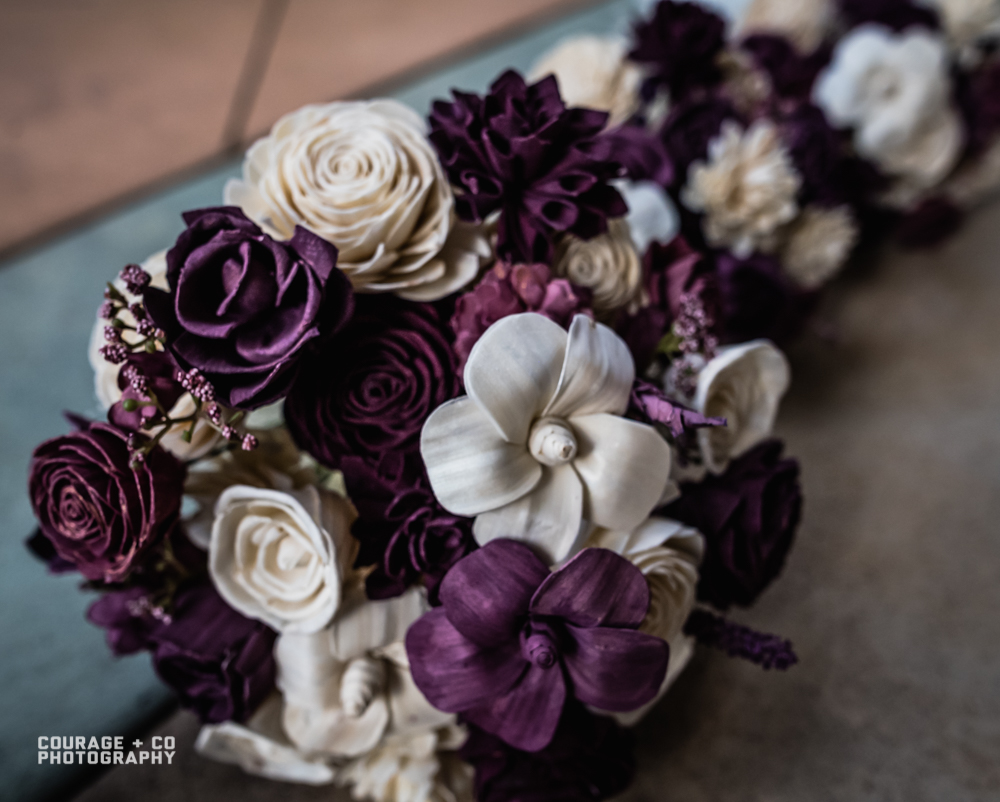
Around mid December Kaela still hadn’t decided on what flowers to have. Then she sent me a picture of a bouquet that was so beautiful with perfect colors. Problem was it was made from sola flowers, which are wood. Yes, wood. I’m thinking, here we go. It was from an Etsy store and had a lead time of six months. Okay, strike that idea. (editor’s note: it was this bouquet, pictured below…it’s beautiful, right?)
After a bit of research, it didn’t seem too difficult to make a bouquet so I did more research. And more, until I was pretty confident I could do it myself. So, I told Kaela. (Secretly, I was hoping she would say just go with silk because those are a breeze to make into bouquets.) But, I have a habit of wanting to get/do things for my kids if there is any way possible and I didn’t think she’d be happy settling for a silk bouquet.
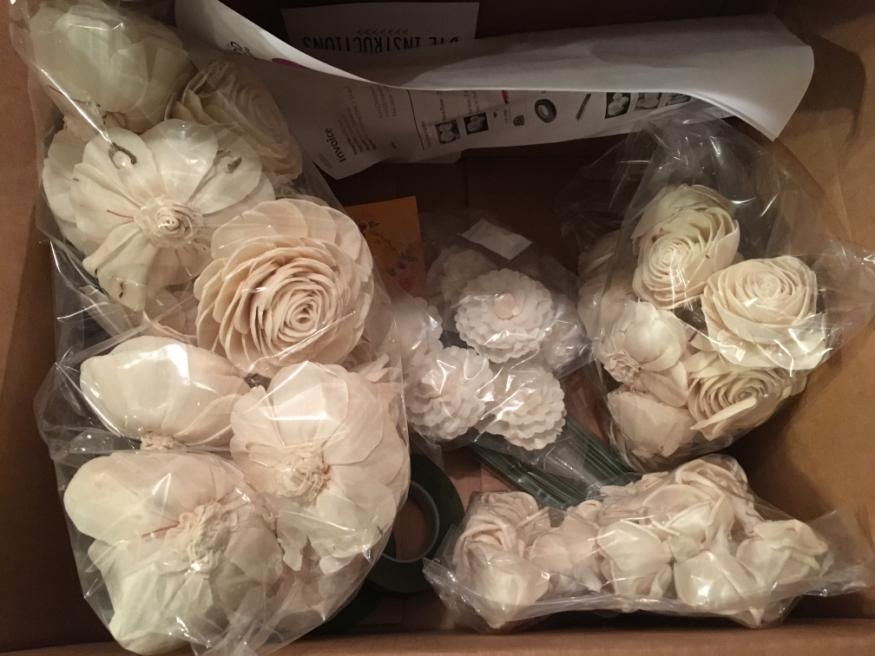
By now, it’s early January and after more research I found a couple of good sites to order “raw” sola flowers, meaning the unfinished ones. Let me say, cheaper isn’t always better with the raw flowers. The first shipment came quickly and my first thought was what did I get myself in for. They’re kind of the texture of balsa wood but they’re pliable. You have to be careful with handling them but they were way less delicate than I thought they would be.
I purchased several of the paints from the site where I got the flowers but quickly realized I could use acrylic paints from the craft store.
I also ordered more raw flowers from Amazon and an online craft place but the quality was questionable. To do the bridal bouquet, four bridesmaids bouquets, mothers’ corsages and all the boutonnieres, I was looking at over 150 flowers. Not all would be dyed, but they had to be good quality. I did check three local craft stores and they had no or limited sola flowers. The few they had were not the right ones.
The Recipe for the Right Color
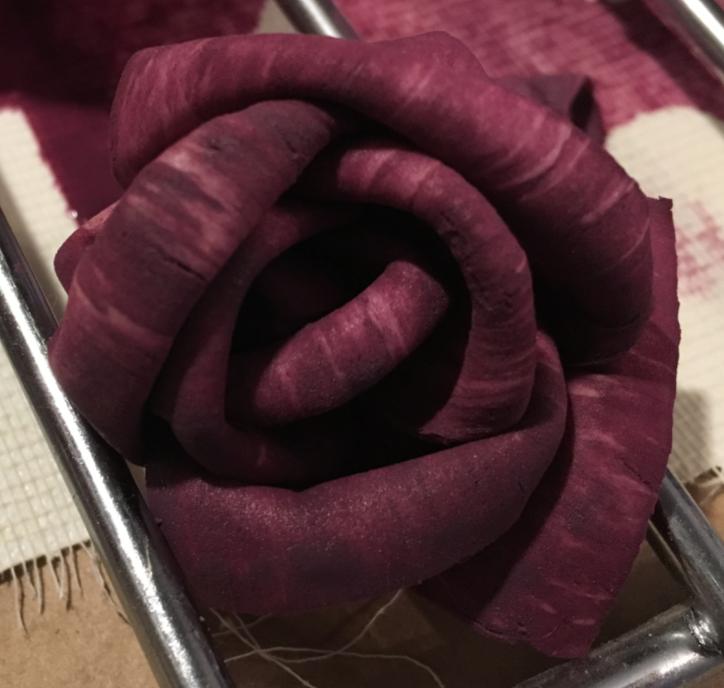
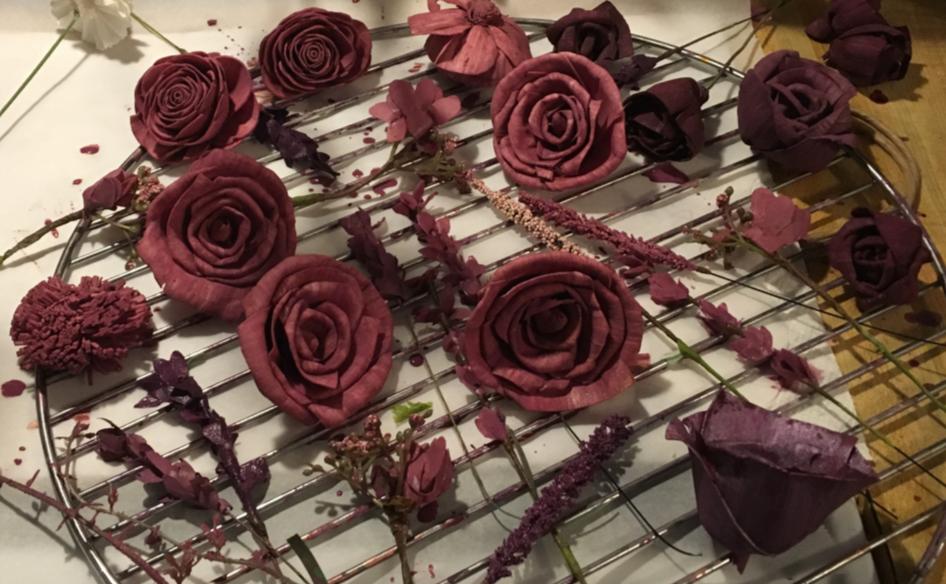
To mix the dye, there are no real directions, so I checked online again and found some recommendations from a couple of others who had done it. One called for 3 T of dye to a cup of warm water. I didn’t like the color so I just started experimenting with a few drops of this color and a good squirt of that color. I got a color I liked and started dipping the roses first. They were turning out so cool! I was really excited it was working. Since I was using such a dark color, it took several dippings to get the color I wanted.
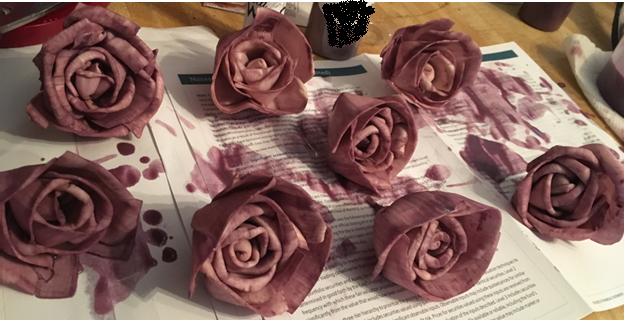 This is after the first dip.
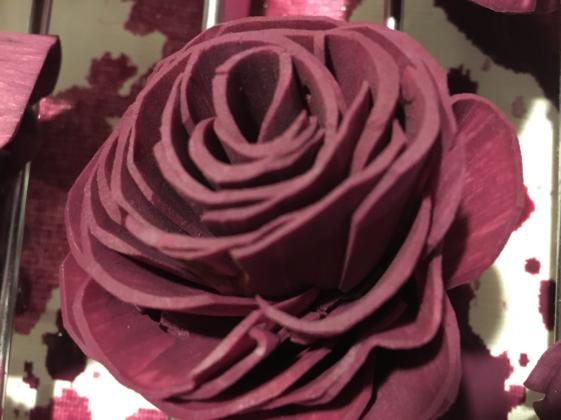
Since I didn’t follow any specific recipe for the first dip, the second dipping the next day was kind of trial and error. Variations of plum is what I was looking for and as long as I kept with the base colors, I figured it couldn’t go wrong. At one of my trips to Michael’s or Hobby Lobby, I found some acrylic paint with sparkles in it. I got a couple of bottles of Rose Blush and Plum something and mixed it in with the base color of Plum or Mulberry or whatever I was using.
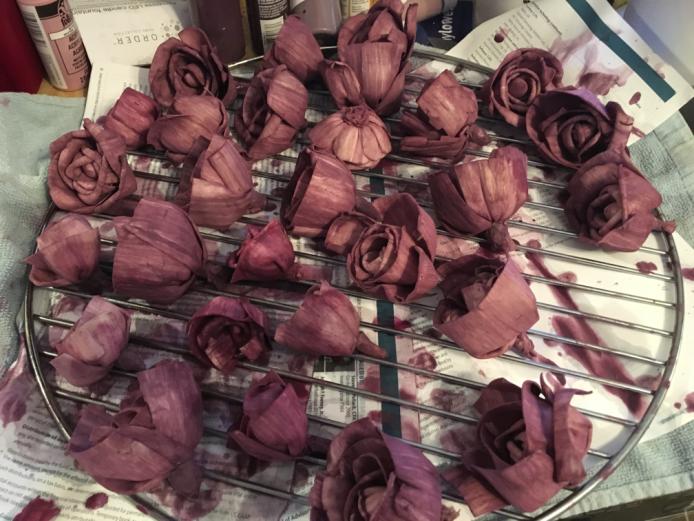
 Second dip
You can see in the pictures that I used a rack to drain them. Under it was newspaper or paper towels to catch the run off. We were also in the process of remodeling our kitchen so I didn’t care if it got on the ugly counters. However, cover everything with paper because I never did get the dye from the countertops.
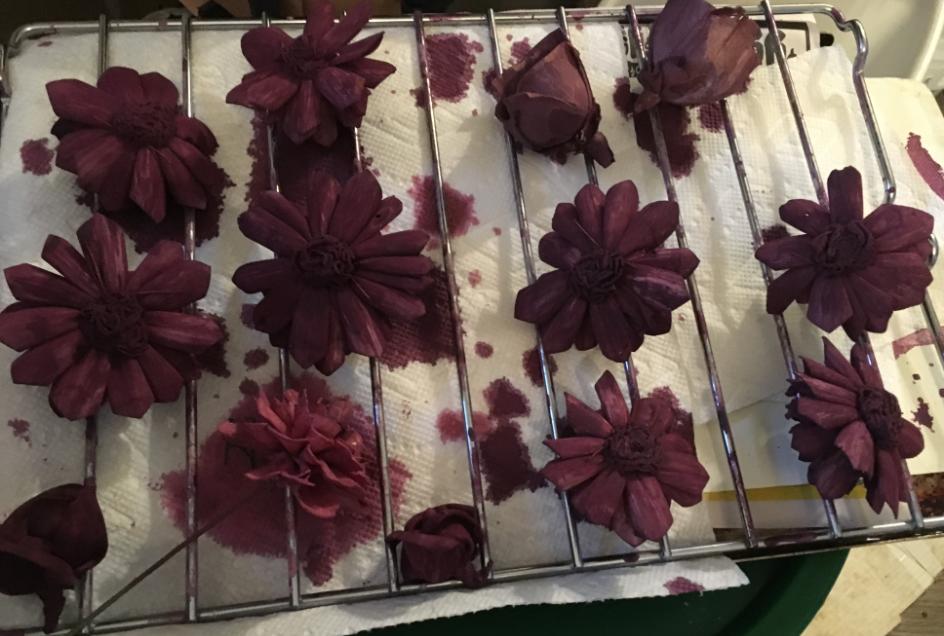
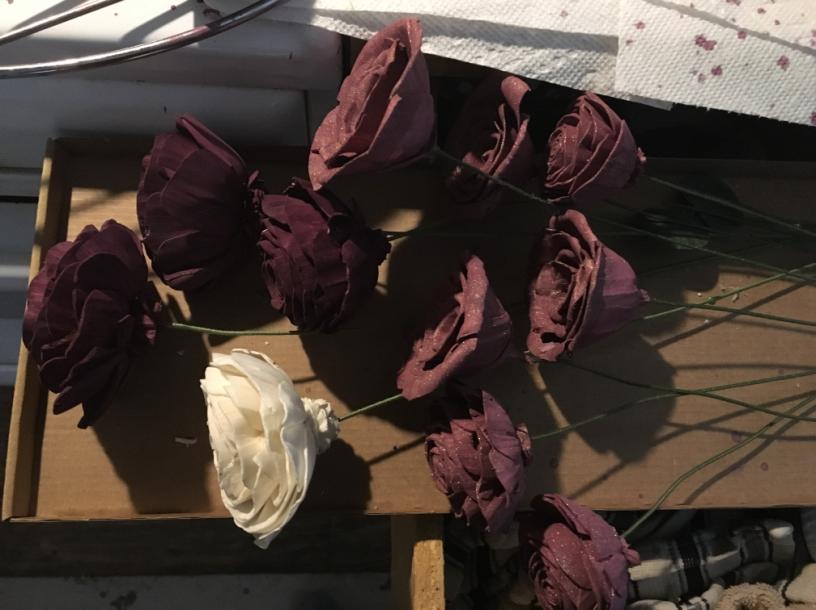
One of the darkest colors. These had to have 4+ dips in some cases, to make sure there were no streaks and the color was evenly distributed. I loved these lily-shaped flowers but their petals broke easily.
We had flowers drying all over the kitchen!
This one needs more dipping to get rid of the streaks.
Since this was the first time I’ve ever done anything like this, I had no idea how long it would take to dry, what the result might be and all that. I soon discovered that the more times you dip a flower, the more brittle it becomes. More brittle flower = pieces chip off easily. Side note: when they got to Florida, I was pleasantly surprised that they were more pliable than when I was working with them in Virginia. Thank you, Florida humidity.
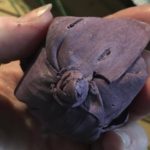
 You can really see this is wood.
Adding Stems
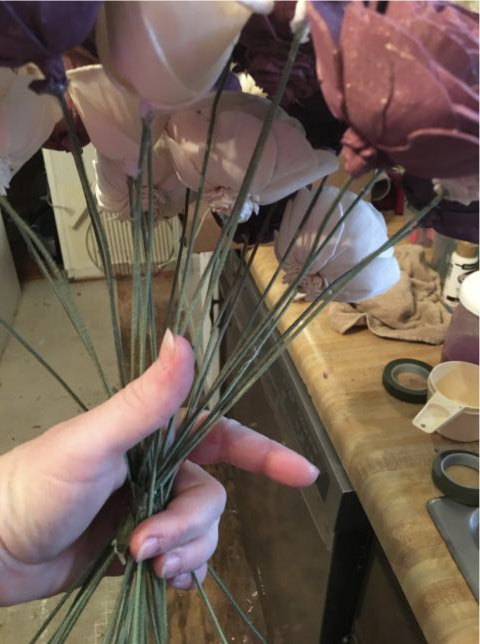
After all the flowers were dipped that I thought I would need, it was time to put the stems in. Not difficult but time consuming. I must have whined enough because I even got Kaela’s dad to help. He did it much quicker, too. (editor’s note: this quickly became a family affair…see how amazing my parents are?! 😭) You just take a piece of floral wire, shoot in a bit of hot glue, carefully hold the flower in one hand while you kind of work the wire into the bottom of the flower. If there was no opening of any kind, I would make a teeny tiny hole for the wire.
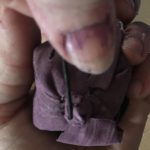
There were only a couple of casualties during this step, mainly because I squished a flower and lost a petal or cracked it when I was trying to get the wire in. (That’s dye on my thumb, btw and I didn’t use this flower. The color was horrible).
Fast forward to mid-January and I’m dyeing or stemming flowers every night. I also had to dip the filler pieces like the little stick things and skinny flower stems:
These were from a spring bouquet I got from Joann Fabrics.
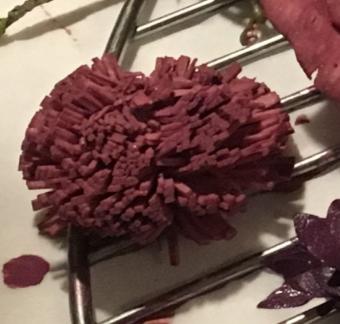
These little mum things were cute and really easy to dip but I ended up not using ANY in ANY bouquet. 🙁 As soon as you touched them (literally!) pieces would start falling off. So much for cute little mum things.
Speaking of falling apart…some flowers more than others would chip at the drop of a hat. To fix these little nicks and cracks, I made a small amount of lighter color and darker color dyes and kept them separate in a covered Mason jar until I was done. This was kind of a color-all that I could dab on when needed. Since the area that needed repair was usually pretty tiny, I could blend the light or dark color and cover any trouble spots.

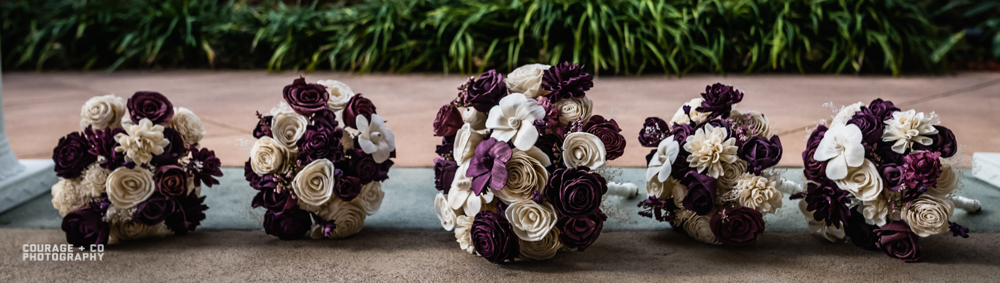
Making a Bouquet
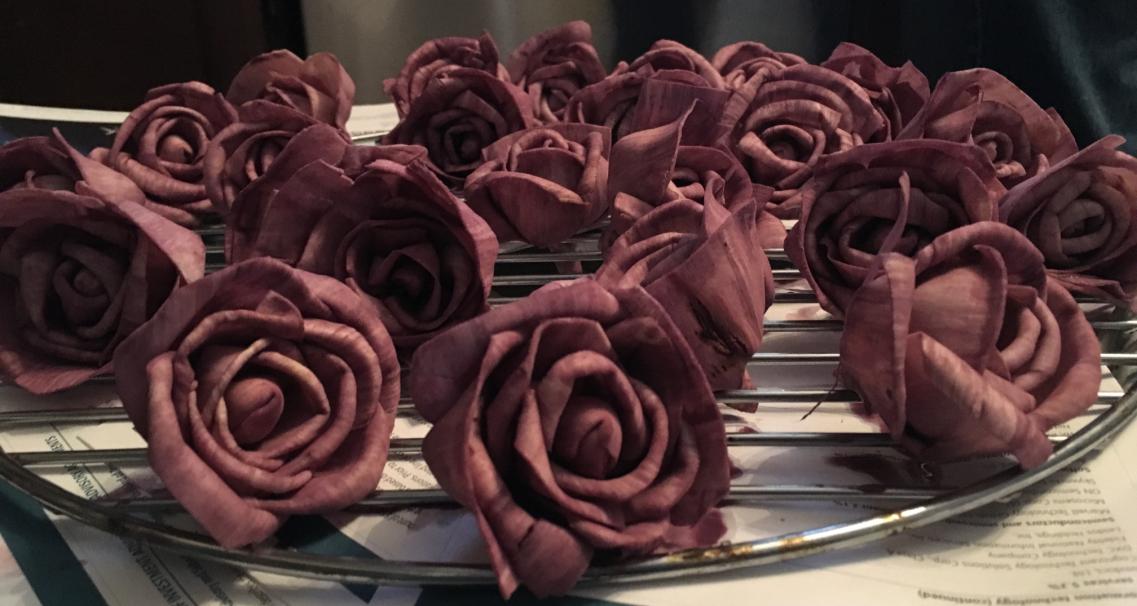
When it was time to make a bouquet, I set aside the color and number of flowers I thought I wanted for the bridal bouquet. Side note: I did save the best flowers for this one. 🙂 Then I gathered a few and just started making a traditional crown shaped bouquet. There are a number of good youtube videos to show you how to do this with silk or real flowers.
I started messing around and held a bunch of flowers up to see what they would look like. I was liking it already. Kaela’s bouquet had about 30-40 flowers and the bridesmaids’ had 20-25.
I looked at many, many ways to finish the bottoms of the bouquets (underneath) and finally decided on stephanotis. It’s easy to break into whatever pieces I needed to hot glue and attach to the wires.
 with and without stephanotis
Then I wrapped it all in floral tape. Lots and lots of floral tape. Then I added a piece of polyester fill cut to fit and finally, Dad had to wrap ivory ribbon around the whole thing to finish it. For the bridesmaids, I used a variety of jute-type rope.
The boutonnieres were much easier – just a few smaller flowers and some filler/leaves, all taped together with floral tape.

Now that they were all done, we had to transport them to Florida. Fortunately, we have a camper but we also had a BUNCH of other stuff to take as well as three little dogs. Dad came through again and used some of the cardboard boxes from the kitchen remodel to make customized, very low budget holders for it all.
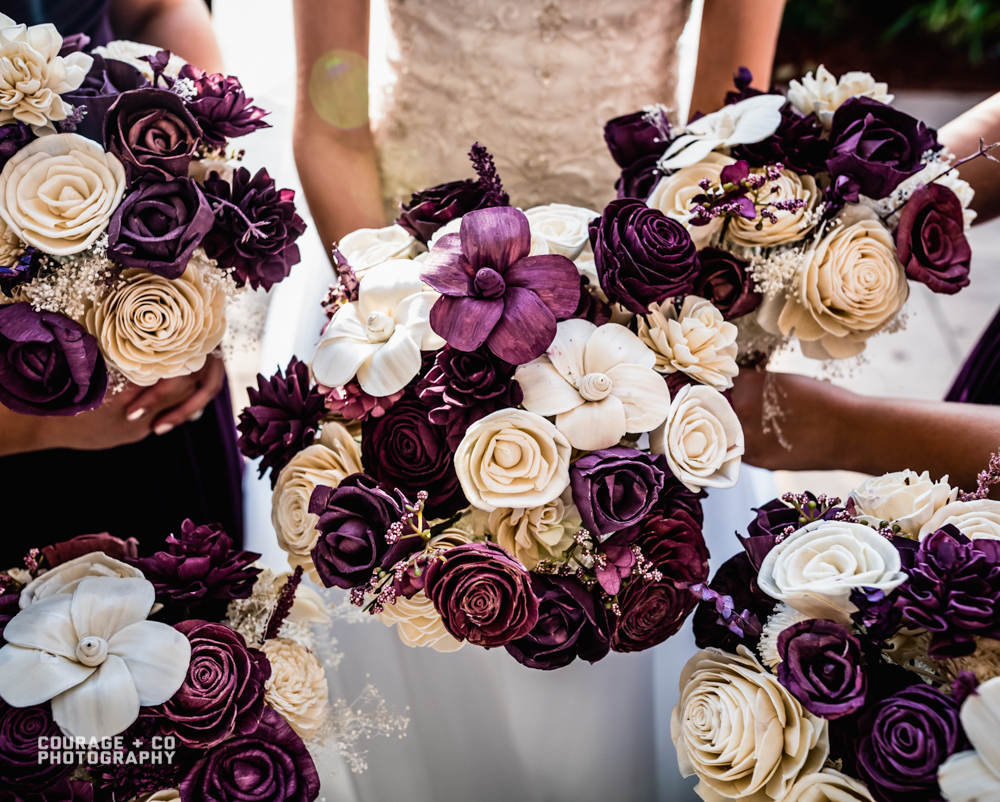
And the corsages/boutonnieres:
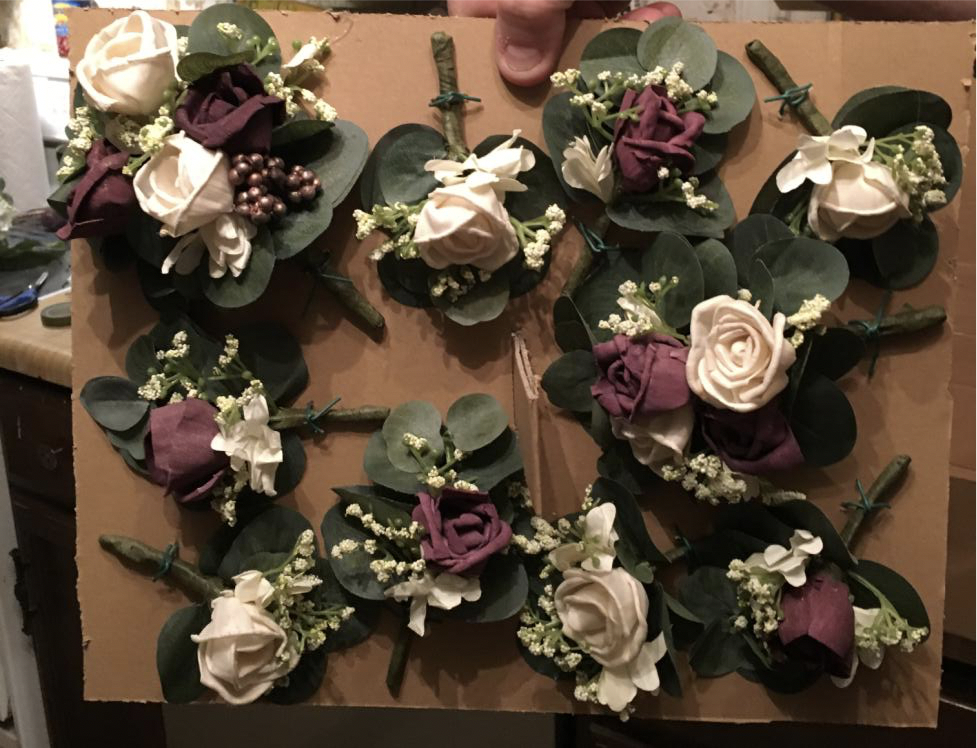 editor’s note: the bigger ones here with multiple flowers are the corsages which my mom and Chris’s mom wore. The purple boutonnieres were for Chris, my dad, and Chris’s dad and stepdad and the white were for the groomsmen. Don’t they all look stunning??
Biggest Stress Points 🙂
- My biggest fear was that Kaela wouldn’t like it. This was her wedding for Pete’s sake. What if they were awful?! Even though we face timed practically every night and she saw them that way, I was still concerned.
- Followed closely by I wouldn’t like the colors or think it was good enough for the wedding.
- Trying to figure out what to put under the whole thing to cover all the wires.
- Making my dress for the wedding at the same time I was doing the flowers. Bad, bad idea.
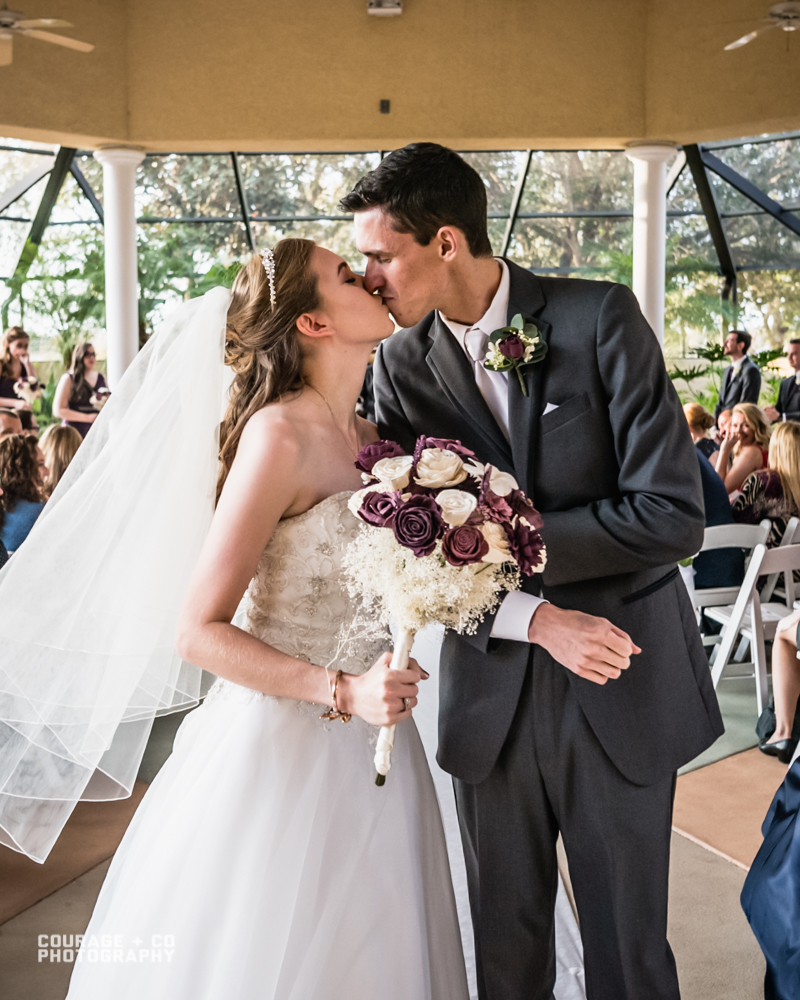
- Fear of the flowers chipping, cracking or breaking if handled too roughly and how they would photograph.
Our super wonderful photographer said they would look fine, even close up. I was very skeptical because I knew how easily they could be damaged.
Fortunately, he was right.
Price & Resources
If you know Kaela at all, she got the frugal gene from me (for some things). However, I want it known I didn’t make her flowers trying to be cheap. Really! I did it because she couldn’t find what she wanted. With that said, I haven’t added up the total. I have all the receipts but that would involve me doing a lot more work than I want to. I can tell you they were significantly less expensive than real flowers, providing you don’t count labor. AND they were customized AND they were made with love. Awww 🙂
- Here is the best video I watched on how to dye the flowers.
- This website has the roses, the lotus (folded) flowers and hibiscus that I used.
- The site I got the first flowers and paints was solawoodflowers.com. Not sure I’d recommend them – kind of high priced and slow shipping. I started off with a bunch of these dyes but it looked a lot like the same stuff I could get at craft stores just with a different label on it.
- I ordered these and these from Amazon – the first link is the little mum looking ones that I wouldn’t recommend. The second ones linked worked a lot better.
- Supplies like floral wire, floral tape, filler flowers, and ribbon were from Michael’s, Hobby Lobby and Joann – whichever had the best coupons or sales at the time. I’m pretty sure most of the cashiers at Joann knew I had a daughter getting married out of state and I was doing the flowers. lol
Final Tips
If anyone decides to do this, a couple of suggestions.
- Have all the flowers available before you start dipping. I was dyeing flowers and then would get more in the mail that I wanted to dye but couldn’t because I needed to keep some “plain” ones.
- Dye each color all at the same time, if possible. I mixed up some dye for the first roses and when I needed more it was a hit and miss to get the color I wanted.
- Give yourself plenty of time unless you can devote enough time to get them done all at once. Allow for drying time – usually overnight – before redipping.
- Do some trial dips of flowers you won’t need just to get the feel for what you’re doing.
- I took an ’emergency kit’ with for any potential cracks, chips, etc.. It was a glass jar, little paintbrush and most of the paints so I could whip up a color quickly and dab it where needed.
– – – – – – – – – – – – – – – – – – – – – – – – – – –
And there you have it!! Doesn’t my mom sound exactly like me in her writing? I was laughing reading it because it reads just like a normal Kaela Celeste blog post haha!!
Anyway – I feel like I’m repeating myself here but I cannot express to you enough how much work my mom (and dad!) did for all this, and how amazing everything turned out. And the best part about having a sola flower bouquet is that now I get to keep it forever! It’s currently in a vase in our living room, right next to some honeymoon photos – so I get to look at it every day 🙂
Ugh I’m just obsessed with it! But that’s enough flower spam for one post! As always the professional photos in this post are courtesy of our amazing Jake at Courage & Co Photography. I sincerely hope this post was at least interesting to read and maybe even helpful to someone out there! Thanks especially to my mom for her input on this post and for everything else she does for me, of course 🙂 Thank you so much for reading and be sure to check out my other wedding posts too! until next time <3


3 Comments
lkc4052
Thank you for posting this and for all the kind things you said! Hopefully someone can get some good information if they try to make their own sola bouquets. Still holding on to the favorite daughter title. ; )
Jessica
Hi! I have raw flowers that I am not planning on dyeing because I like the color, however, do you have recommendations about paint/dye to cover some of the wood blemishes that are darker brown color? I want the paint to match the raw flower color and some of the blemishes are bad in my opinion so just looking to touch them up. Thanks!
Kaela Celeste
Hey! I’m so sorry I only just saw this comment. My mom suggested using a very small amount of a watered down light acrylic paint maybe rather than a dye – it would be easier to do a perfect color match because you can take some of the flowers into the store with you rather than trying to match online to a computer screen! Hope this helps!